 Step 1: Create 2 layers in Adobe Photoshop. One with your image and one with the desired watermark in black.
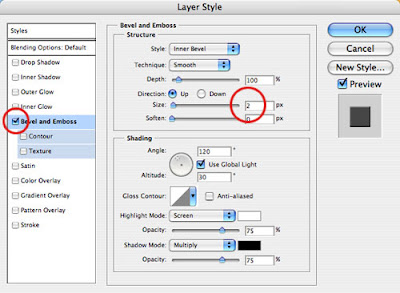
 Step 2: On the layers palette click the effects button at the bottom and select Bevel and Emboss from the pop up menu.
 Step 3: Change the size to 2 px (this is for a 72 ppi image)
 Step 4: Change the layer mode to Screen. Save for web and you are ready to upload your image to the web.


3 comments:
Yowsa! Thanks Scott.
Thanks for this tutorial Scott, and welcome to the Art of licensing group.
I've been trying to figure this out! Thanks so much for the step-by-step!
Post a Comment